As I had some questions by mail about my SSD1306 SPI and I2C driver port for Raspberry, I decided to get back to this driver and write some documentation.
The first time I wrote it, I tested with SPI oled but did not test with i2c because Adafruit I2C OLED display was not in stock. But for now, I have one and I will to verify that it is working also with I2C.
What do you need ?
- A Raspberry Pi (Rev 2 or Rev 1) with Raspbian, I recommand the Wheezy version
- A I2C or SPI Adafruit OLED display (or whatever but take care at the wiring and powering the OLED)
- Wiring cable or better if you do not want to use wire, a ArduiPi Board that contains connectors for Adafruit OLED. This is with this board that this tutorial was made
- SSD1306 Library Source code located on my github
- Setup correct I2C bus according to Raspberry Pi Revision (1 or 2)
Assumptions
- You must have dev tool installed onto your Raspberry Pi for compiling the driver library and a updated Wheezy distribution is preferable.
- A good idea to read the excellent Adafruit tutorial about OLED display
Cabling the OLED Display
The SPI display use more pins than the I2C version, has I connected it to a ArduiPi board the connections are already done on the board so nothing to do, but if you want to do it with cable you should do it as following /
- Connections for SPI
| Adafruit SPI Display | OLED Pin | Pi P1 Header Pin | Raspberry Pi Pin |
|---|---|---|---|
| GND | 1 | 6 | 0V |
| 3V3 (output, leave unconnected) | 2 | ||
| VIN | 3 | 2 | 5V |
| DATA | 4 | 19 | MOSI (SPI) |
| CLK | 5 | 23 | SCLK (SPI) |
| D/C | 6 | 18 | IO24 (GPIO) |
| RST (Reset) | 7 | 22 | IO25 (GPIO) |
| CS (Chip Select) | 8 | 24 | CE0 (SPI) |
- Connections for I2C
| Adafruit I2C Display | OLED Pin | Pi P1 Header Pin | Raspberry Pi Pin |
|---|---|---|---|
| VIN | 1 | 2 | 5V |
| 3V3 (output, leave unconnected) | 2 | ||
| GND | 3 | 6 | GND |
| RST (Reset) | 4 | 22 | IO25 (GPIO) |
| SCL | 5 | 5 | SCL |
| SDA | 6 | 3 | SDA |
Ok done, now go to Raspberry Pi
I am connecting to Pi with ssh, once you’ll on the Pi issue the following commands :
To be able to compile you will need the compiler and some others tools, issue a :
sudo apt-get install build-essential git-core libi2c-dev i2c-tools lm-sensors
To drive the Raspberry PI I/O ports I decided to use the small and pretty cool library bcm2835 from Mike. I added some functionalities so I included directly in build so you do not need to install anything. The features added are :
- Added millis() function
- Added option to use custom Chip Select Pin PI GPIO instead of only CE0 CE1
- Done a hack to use CE1 by software as custom CS pin because Pi hardware SPI for CE1 seems not to work (I will investigate on this later)
- Added function to determine PI revision board
- Added function to set SPI speed (instead of divider for easier look in code)
- Rewrited the I2C functions, I was unable to get the included one working, surely I was doing bad things
Bryan found a problem because i2c and bcm modules were not started and thus he cannot start the sample code. He gave us the solution to start the modules at startup by adding the two following lines into the file /etc/modules
i2c-bcm2708
i2c-dev
These lines was enabled by default on my Adafruit distribution, that is why I did not had it.
Installation of SSD1306 Driver
The SSD1306 Driver is based on Adafruit Arduino library, I just ported the code to be able to compile and run on Raspberry Pi.
The driver is compiled into a library with all functions, including driving OLED with SPI or I2C and driving 128×32 and 128×64 LCD size. The LCD size and driving mode is now on the new init function of the class, no need to compile with #define
Get all the file from github dedicated repo :
git clone https://github.com/hallard/ArduiPi_SSD1306.git
The buid install process is in the Makefile, so issue a:
cd ArduiPi_SSD1306
sudo make
The new build script will compile the library (libssd1306.so.*) and install it for you (this is why need sudo) library in /usr/local/lib/ and library headers in /usr/local/include/
Fire the sample test code
Go to the examples folder and issue a :
sudo make
Plug the OLED on your ArduiPi board (or manually wire), and you’re in,
./ssd1306_demo --help
You will see help and OLED supported
./ssd1306_demo
Usage is: ./ssd1306_demo --oled type [options]
  --<o>led type
OLED type are:
  0 Adafruit SPI 128x32
  1 Adafruit SPI 128x64
  2 Adafruit I2C 128x32
  3 Adafruit I2C 128x64
  4 Seeed I2C 128x64
  5 Seeed I2C 96x96
Options are:
  --<v>erbose  : speak more to user
  --<h>elp
<?> indicates the equivalent short option.
Short options are prefixed by "-" instead of by "--".
Example :
./ssd1306_demo -o 1 use a Adafruit SPI 128x64 OLED

./ssd1306_demo -o 4 -v use a Seeed I2C 128x64 OLED being verbose
For now the Seeed OLED are not yet supported, I will work on this soon
So launch the following command to use a Adafruit SPI 128×32 OLED :
./ssd1306_demo --verbose --oled 0
For a I2C 128×64 OLED do a :
./ssd1306_demo --verbose --oled 3
Now time to post some picture of course
This one with SPI OLED
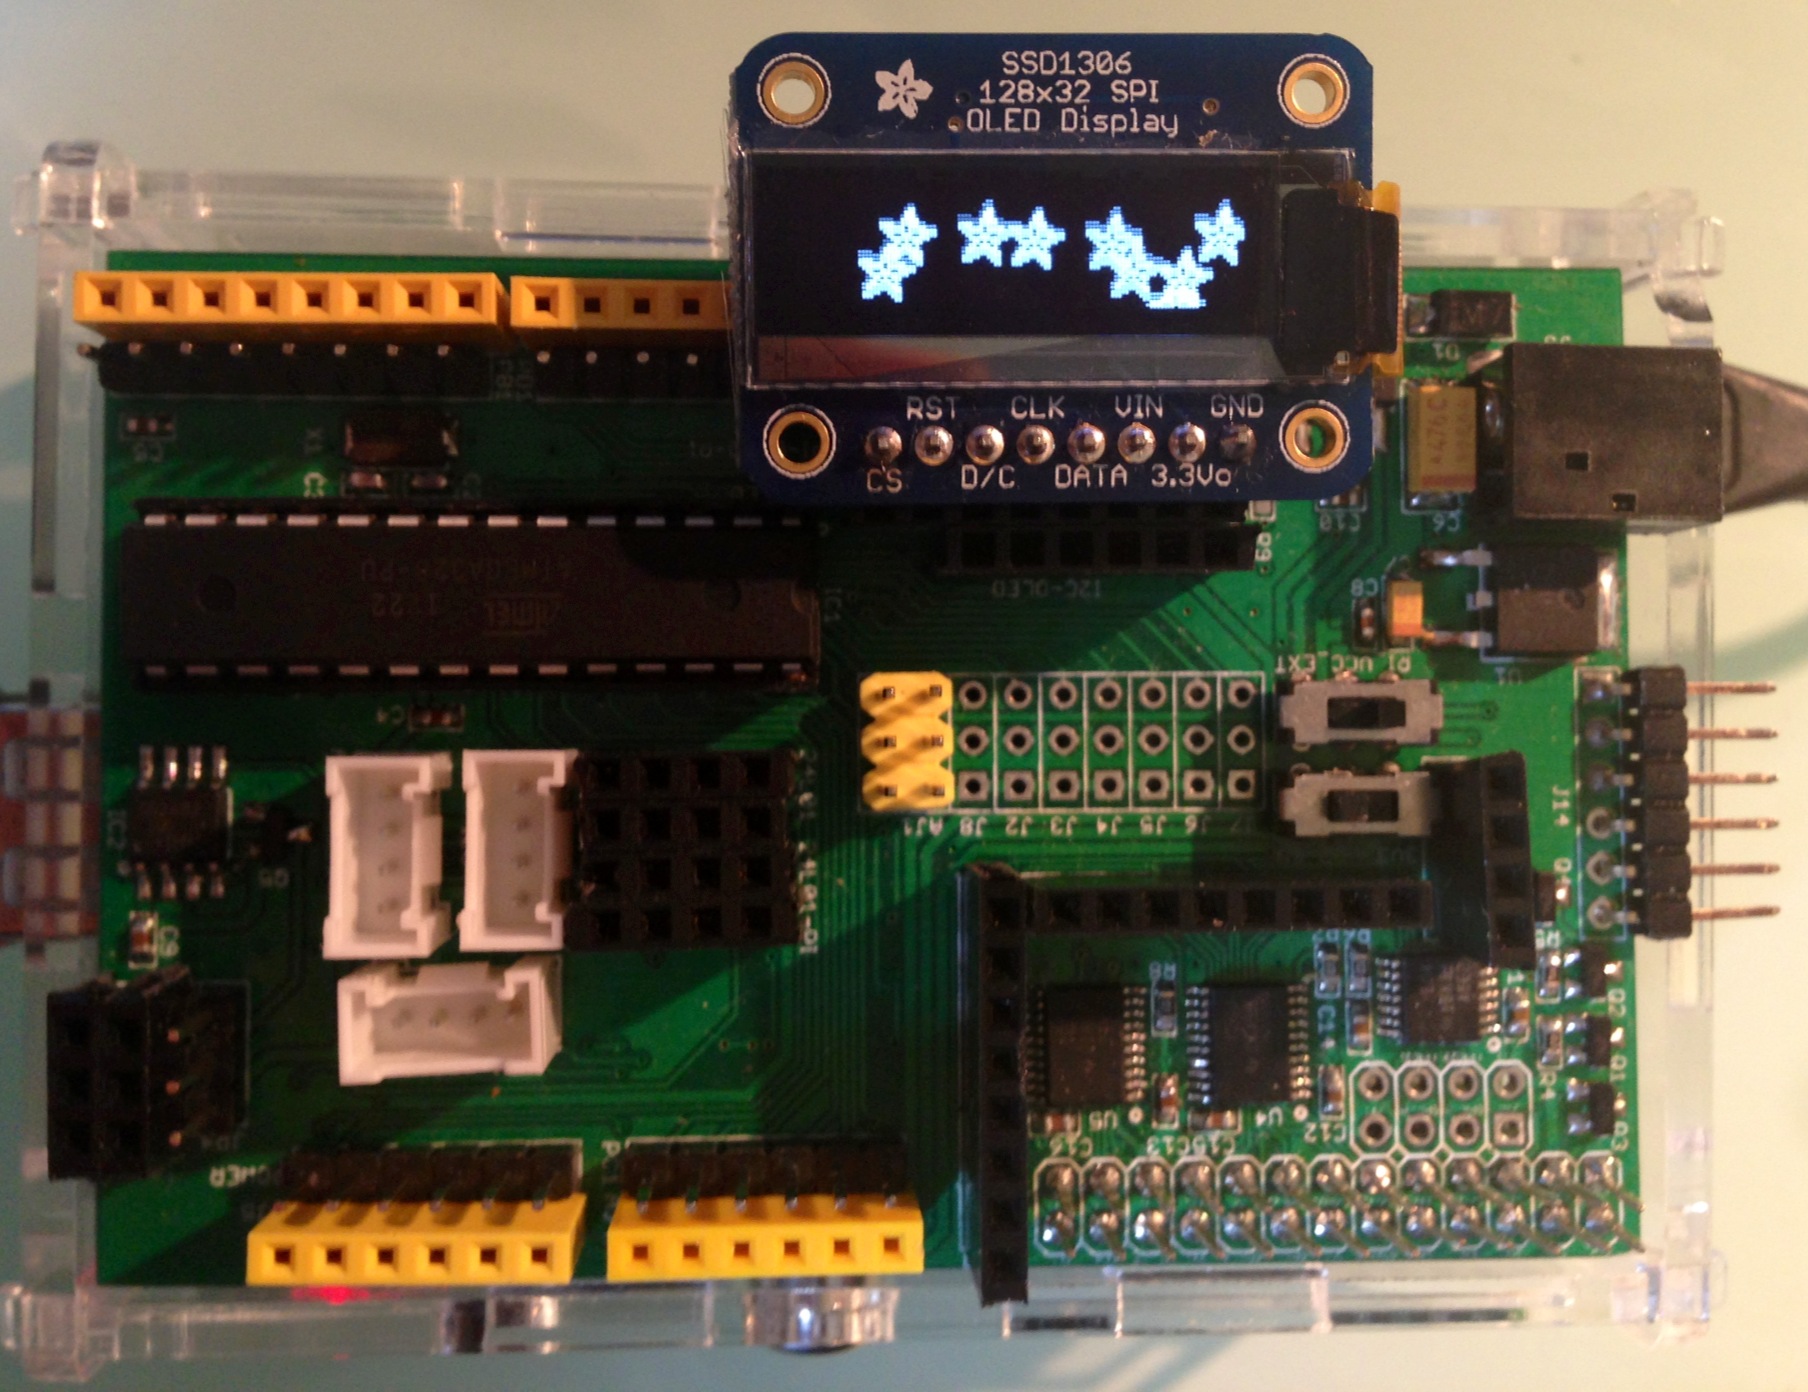
Adafruit SPI SSD1306 on ArduiPi
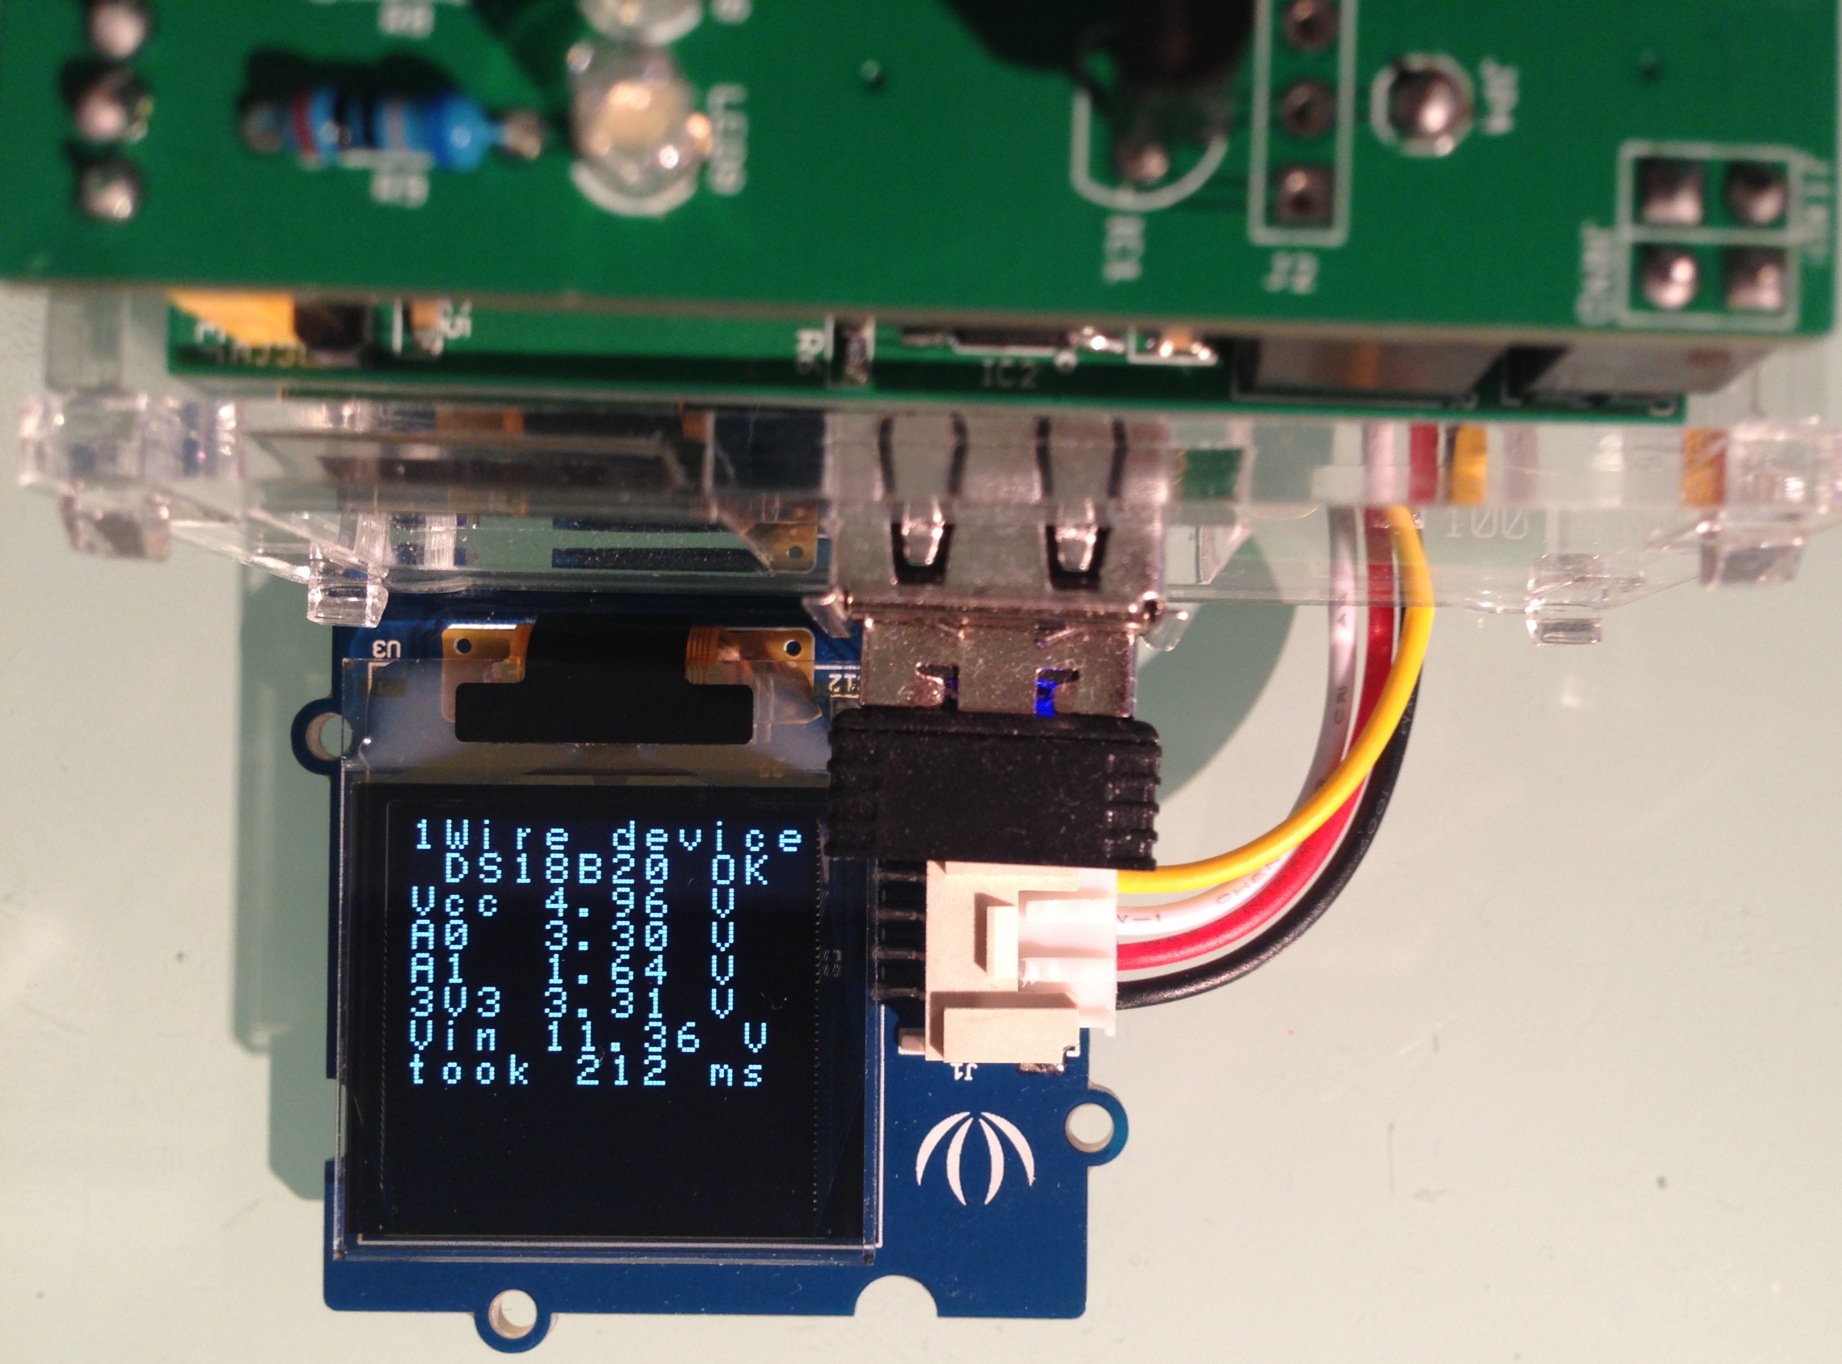
The second with I2C OLED

Adafruit I2C SSD1306 on ArduiPi
Next job will be to add to this library the Seeed 96×96 OLED that is pretty fine, see below, but for the picture below it is driven by the Arduino side of ArduiPi board when doing test with ArduiPi test board
ArduiPi Test Board with Grove Oled Display